How to Collect
Required Tools:
- Water and food for the day: it is a long day in the sun! I recommend packing food in waterproof bag to avoid soggy sandwiches later
- Sunscreen and a hat: There is minimal shade in the Peace River as the fossils are usually found away from the bank, prepare well!
- Dress for water: Waders or a wetsuit are fantastic for the colder months when the water tend to be low but a swimsuit would also work well
- Fossil Collecting Permit: To legally collect any vertebrate fossils, besides shark and ray teeth, on public land you need a permit. To get your permit go to the link here and mail in an application. They require a report of any unusual fossils or sites to the museum for further research.
- Dry box or bag: Something to keep your valuables safe and dry in, if in a canoe or kayak use one that floats.
- Water shoes or boots: Something with a hard bottom as there is unfortunately a lot of litter and broken glass in some areas due to recreational visitors. From experience it is not fun stepping on barbed wire!
- Shovel: I recommend a long square shovel with plates to push the shovel through densely packed gravel but a regular round shovel is also good for punching into the gravel. Some use sand flea rakes aka “Florida snow shovels” but I much prefer a standard shovel for ease of use and depth.
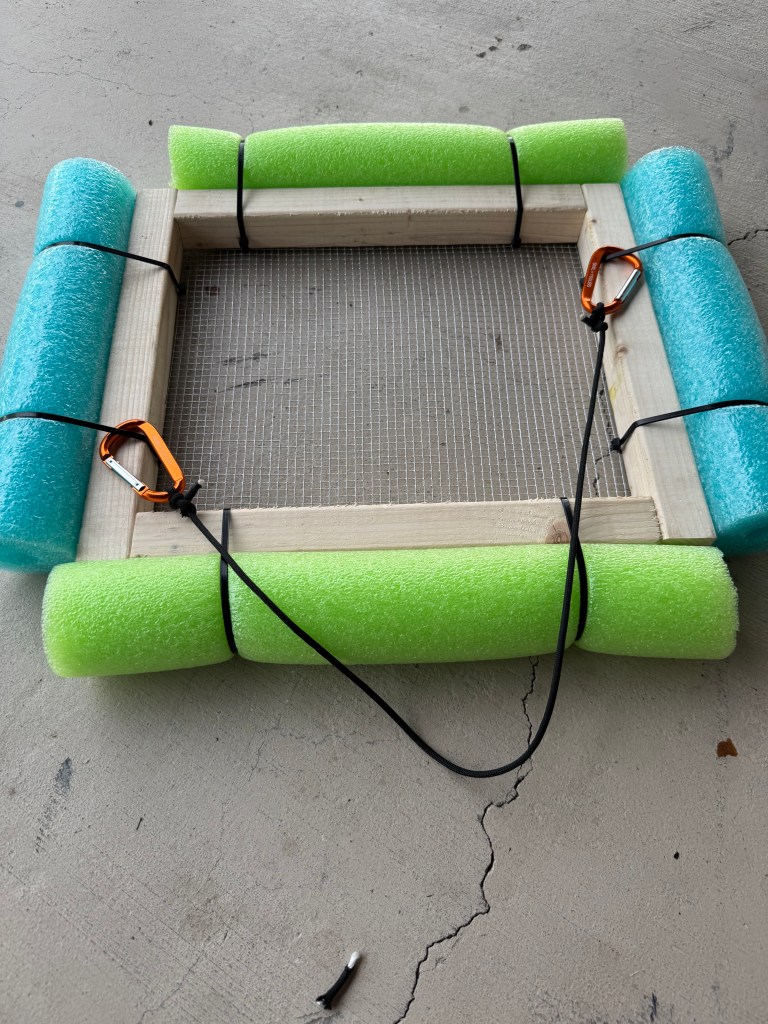
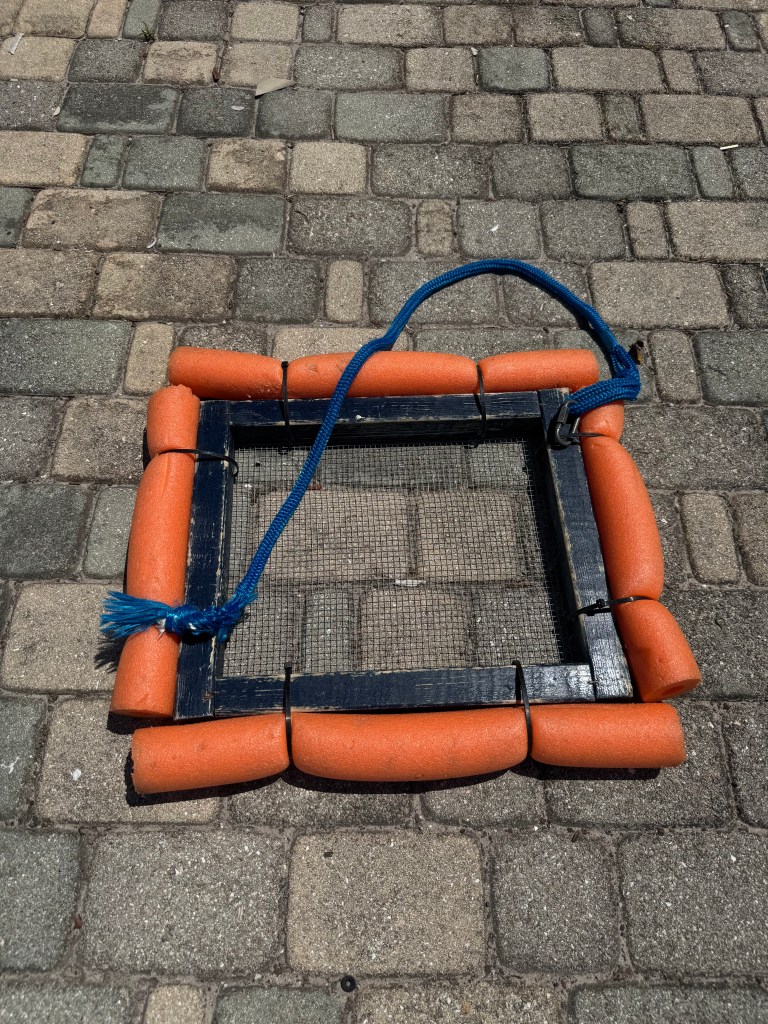
- Sifter: A 1/4″ mesh sifter made of wood and chicken wire helps process large amounts of gravel. Instructions on how to make your own are at the bottom of this page but some places, such as canoe outpost, allow sifter rental.
- Backpack: Something to carry all of that gear! A nice heavy duty backpack will do, or whatever you have around that is fine to get wet!
- Mesh bag for fossils: Something that allows water to flow through, I use a diver’s bag that can hook onto my waistband so its easy to access when sifting away from my backpack. A Ziploc bag would work fine but be careful not to lose it! A photo of the one I use is below.
- Optional: Mask and snorkel: It can be an incredibly helpful tool to examine the hole you are digging or checkout an exposed gravel bar for any larger finds. The largest fragment of mammoth tooth that I recovered was inside the hole I was digging but was too large to come up on a shovel! Be mindful if snorkeling an area for gator activity or log jams.
- Optional: Kayak or Canoe: Having access to or renting a canoe or kayak allows access to areas that are less dug out than the easily walkable gravel bars. They can be rented at multiple places along the Peace River where they drop you off upstream and pick you up downstream allowing a relaxing paddle with the current.

When to go:
There are two main factors when deciding the time of year to collect on the Peace River: Weather and Water Level. Monitor weather conditions in the area you plan to collect and avoid thunderstorms or heavy rainfall as it makes the river very fast moving and lowers the water clarity. Underwater visibility in the river is low on a good day with tannins from decaying plant matter turning the water to a murky brown so any additional cloudiness makes snorkeling almost impossible.
For water level utilize the USGS gauge titled Peace River at SR 70 at Arcadia, FL – 02296750. When viewing that gauge shoot for a level below 2.50 feet as anything above is difficult to find an area shallow enough to dig. The water level is typically ideal from around November to May but changes every year depending on weather. The gauge can be found here!


Where to go:
Spots along the Peace River are closely guarded secrets of most fossil hunters that requires some scouting, so I will not give any exact locations but help direct how to find some. First choose a boat ramp or kayak launch along the Peace River that has parking access and is in or north of Arcadia. Either launch a canoe or walk the bank looking for an area that is not much above waist deep and start to feel for gravel. Some gravel may be exposed, other area may require a probe or metal rod to feel crunchy gravel under the sand. Either way do a few test sieves and make sure that it is a productive area before you choose to spend the day there but do not be dismayed if you do not find anything in your first few sieves. It may take some time to be accustomed to seeing the fossils in a screen.
What to do when there:
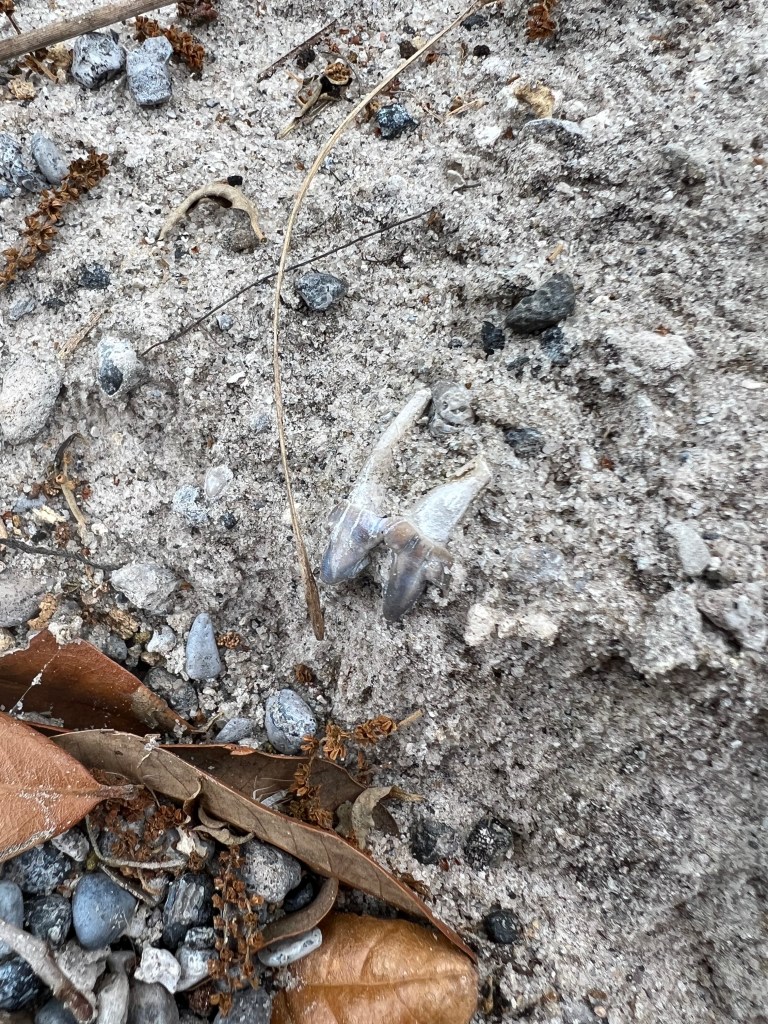
Once you choose a spot to dig fill the sifter with 2-3 shovelfuls of the gravel. Dig a deep hole throughout the day and try to stick to one area to get past the top layers, bigger fossils can tend to sink lower under the more sandy layers. Once your sifter is full shake out all of the sand and smaller gravel, pushing your sifter underwater can help some of the lightweight leaves flow out. Search the remaining gravel for fossils, keep an eye out for any unusual shapes and take any unknowns home to research later. I try to life my sifter out of the water to let the sun hit the shiny enamel of shark teeth and make them easier to pick out.
Additional tips and tricks:
- Dig with your shovel facing the current
- Position your sifter where it isn’t covered by any shade
- Take odd ones home and research later, better to save weird rocks than to lose potential fossils!
- Start with less gravel per screen until you are more experienced
Potential Hazards:
As with anything worth doing there are potential risks and hazards, though the danger is low I feel it is important to discuss them.
- Alligators: All bodies of water in Florida have alligators and the Peace River is no exception. I have seen countless gators throughout parts of the Peace River, more so in the southern areas where water is deeper and the river is wider. An important reminder is that they are not out to get us and if you do not mess with them they are unlikely to mess with you. I have had 0 issues despite numerous years in the river but it is always important to be aware. Do not approach alligator nests and do not enter the water close to where you spot a gator, it is always better to be safe. Divers and snorkelers put themselves at a much higher risk and sifting in waist deep water is usually the safest when searching murky water.
- Snakes: There are species of venomous snake in Florida and they can be found along the river, just avoid them and do not touch any snake or approach any snake. They will not chase you, just leave a clear path of escape for any animal and watch your step.
- Weather and current: Avoid fossil hunting during thunderstorms and be mindful that the current can be very fast in some areas! Keep an eye on any children with the group and stay in shallower water if the water is moving quickly.

How to make a sifter:
- Gather tools and materials:
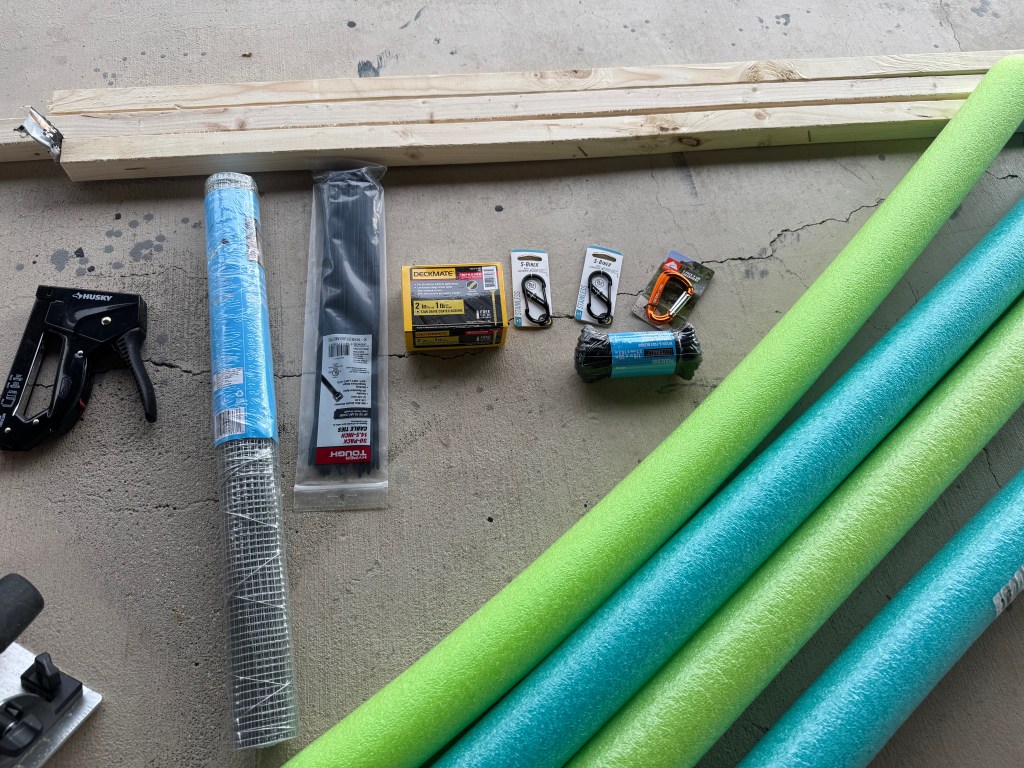

Tools:
-Tape measure, drill, clippers, wood stapler, pencil, and a saw (any type, circular or table would work best)
Materials:
-1×1 wood, 1/4inch chicken wire, screws, ideally 2 inch wood screws, long zip ties, pool floaties
Optional additions:
-Paint, carabiners, paracord or thin rope
2. Measure and trim wood
Measure and cut 4 equal sections of the 1×1 wood. I do 14 inch sections. Cut the wood with your saw of choice after marking the wood with the pencil

Step 3: Assemble the frame
Drill pilot holes into the wood with a narrow drill bit and drive the screw through the holes to form the wood into a rectangle frame (see photo for reference)
Note: this is when I’d paint the wood if you plan to do so. I did not paint mine this time.

Step 4: Attach the wire mesh
Lay the chicken wire over the frame and pull it tight, then begin to staple the wire to the frame with just a few staples to keep it tight while you trim the excess wire
Step 5. Use the clippers to trim the excess wire off, leaving about 1/2 inch from the edge of the wood to the start of the wire. Be careful to not leave sharp ends.

Step 6: Finish stapling the wire down to the frame, use plenty as it any sag in the wire is a weak point that may break after heavy use.

Step 7: attach the floaties to keep the sifter buoyant
Cut floaties to match all 4 sides, a simple knife will work fine for the floats. Attach each float with 2 zipties, one near each end. If the frame is fine but the floaties get beat up over time they can be easily removed and replaced.

Optional addition: Carrying cord
I like to add a small cord to both sling over my shoulder to make carrying easy as well as hook on to my waist while in a fast moving river to free up my hands while digging.
Use two carabiners of your choice and tie to both ends of the rope with small loops. Keep in mind the rope length to have it comfortably sit on your shoulder or back.